Longmont, CO
 Project Coordinated by Customer Service Team
Gutters
,
Siding
,
Windows
Longmont, Colorado
James Hardie Siding and Pella Impervia Windows Bring Modern Gray and White Exterior to 1979 Longmont Home
The Problem
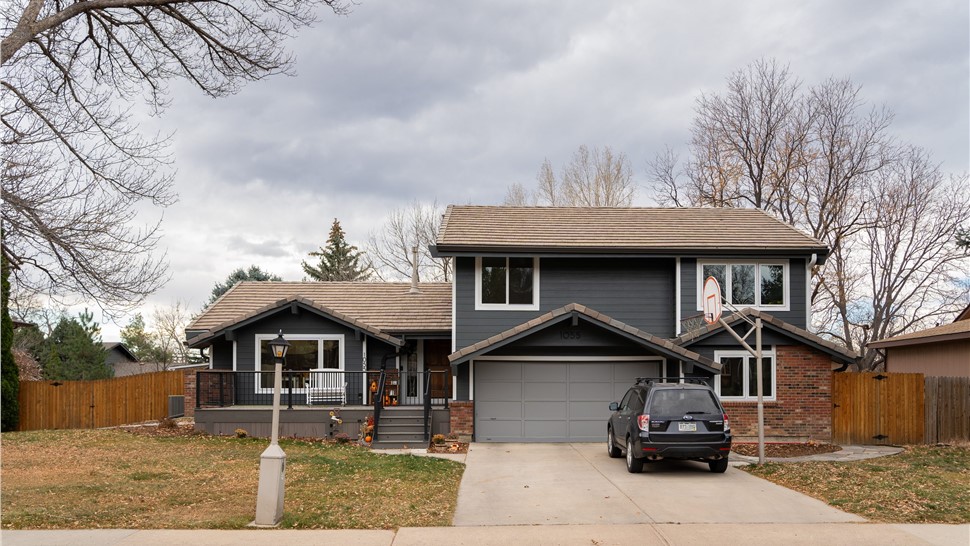
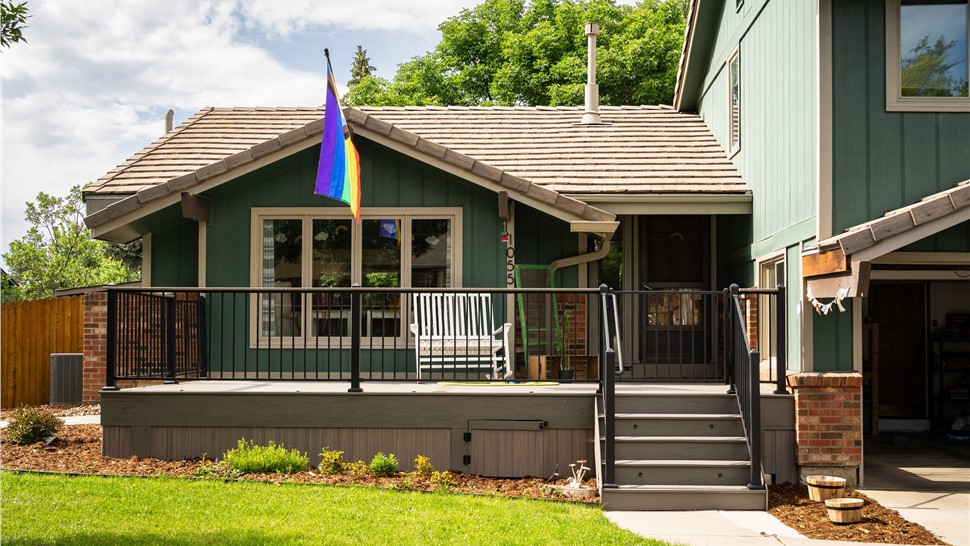
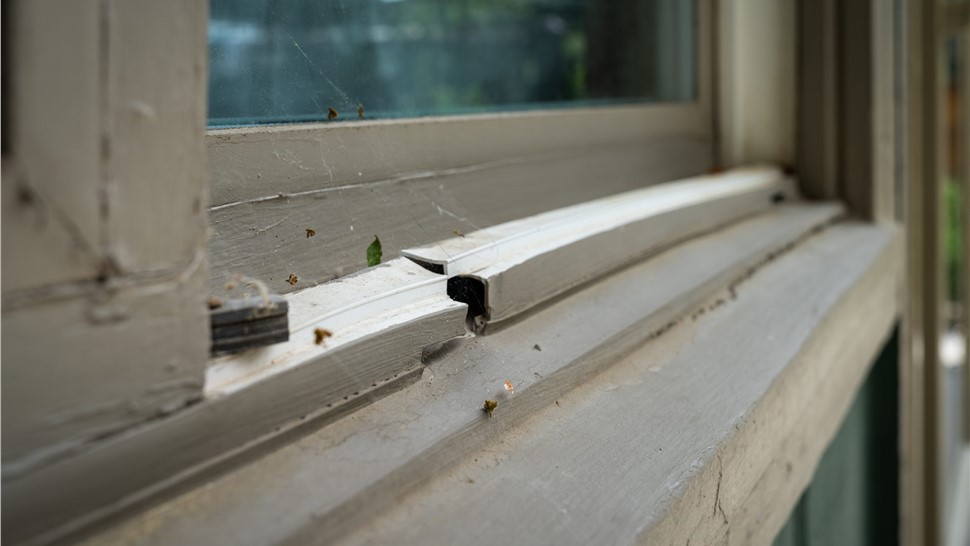
Sandy and Katie's 1979 home sits on Princeton Drive in Longmont. It's a multi-level house with stepped gables, brick at the entry and garage, and a brown tile roof. The original siding was a vertical-groove wood painted teal green, with light trim around the windows. By the time we came to inspect the home the couple had been thinking about replacing four of the windows on the Southwest face of their home for years. They were old and inefficient. When they were hit by the hard Colorado sun, the solar heat gain was intense. They wanted to replace them with energy efficient windows so they could keep the natural light, while keeping their energy bill in check. It was their neighbor across the street, a past WestPro roofing customer, who finally connected the couple to WestPro and they were quick to reach out. They invited our Project Consultant, Diego, to come take a look at the home the following week.
As Sandy, Katie and Diego began talking through the window replacement, they were initially searching for a color to match the aged vinyl windows, but found none. The choice then, was whether to invest in only a few windows that wouldn't match the rest of the home or to do a whole-house window replacement and have them match. They chose the latter. They selected Pella Impervia windows with Low-E glass to address the temperature of their home.Low- E (low-emissivity) glass is an energy-efficient type of glass treated with a microscopic, transparent metallic coating that reflects radiant heat while letting visible light pass through.
Deciding to upgrade all the windows on the home opened up a broader conversation about their goals for the home in the coming years. They shared that they planned to re-do the aged teal siding in the next few years anyway. After talking through the correct sequence for exterior remodeling work, they opted to move forward with replacing their siding sooner as part of the scope of this project. Together, they built a plan that covered both: new James Hardie siding, soffit, fascia, and gutters, along with new Pella windows and patio doors throughout. Two trades, employed together, to maximize efficiency and cut cost.
This choice not only simplified the work from a sequencing perspective, but was ultimately a prudent economic choice. Splitting projects up can feel safer for a budget, but it often means paying for the same work twice. A contractor who knows your full scope can sequence the work so nothing gets installed and then torn out again. On Sandy and Katie's home, the windows were installed while the siding was already off, so the exterior trim around them only had to be built once. The same logic applies to the windows themselves. As our window replacement cost guide explains, the crew time, truck, equipment, and setup for a window job cost about the same whether the job is 10 windows or 20. Replacing every window at once means only one mobilization, one permit, and one manufacturer order instead of several. And in practice, doing a few windows at a time over multiple phases is usually the most expensive way to get there.
What We Did
The plan came together in June 2025, when our Project Manager, Luke, held the siding pre-construction meeting and the final window measure on the same day. During that visit a few key adjustments were made to both the window and siding plans that would result in a better finished project in the end.
For the windows, two openings on the front of the house were initially going to be replaced with double hung windows. But, as double hungs, they wouldn't have met Longmont egress window requirements. This code requires that bedroom windows open wide enough for someone to get out in an emergency. The solution was to change one to a slider and the other to a casement, making sure we chose styles that kept the front of the house looking the same. A similar code requirement drove us to add tempered glass to a window by the front door because it sat less than 18” above the deck and could injure someone if the glass broke. Having the expertise of our partner team at Pella evaluate the home alongside our Project Manager is an important step which ensures that window replacements, a complicated and nuanced trade, are not only installed correctly the first time but can also pass inspection.
The other benefit to changing all the windows at once was that it allowed us to be strategic with what we replaced. The couple wanted fewer, larger windows in one area, and more natural light throughout. To achieve this, we found a creative solution to combine two pairs of windows into two single units. This not only cleaned the look up visually, but bought them a few extra inches of visible glass. Finally, they were able to find room to add a sidelight that hadn't existed before next to the front door, ushering natural light into the entry.
The same visit shaped the siding plan. After seeing the condition of the existing siding Luke identified that the existing sheathing was rotted through in several areas. He recommended a full layer of new OSB sheathing across the walls before any new siding went on. He also recommended wrapping the home's exposed rafter tails (the ends of the roof framing that stick out past the walls) in aluminum coil so they'd be protected from the weather and would tie in seamlessly with the new look.
With all details of the plan ironed out, we began work mid August of 2025. The crew started by tearing off the old wood siding, along with the soffit, fascia, gutters, and downspouts, and installing the new OSB. As we mentioned earlier, removing the old siding first allowed us to install the windows the right way: fitting each new unit into its opening and properly flashing it before any new siding was installed around it to tie it all together. This strategy also meant the windows only needed to be trimmed on the inside, since the new exterior siding and trim finished the outside. Working from the back of the home to the front, the window installation took two days to finish.
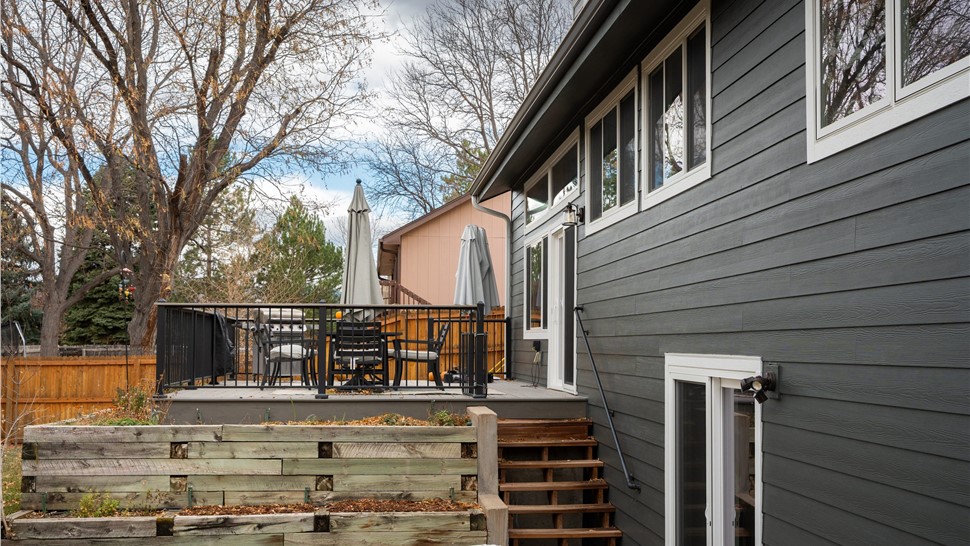
As a Pella Platinum Certified Elite Contractor, we installed 18 Pella Impervia fiberglass units, one Encompass by Pella vinyl slider in the basement, and two Pella 250 Series vinyl sliding patio doors. The windows were finished inside and out in white, with Advanced Low-E insulating glass, and tempered glass where code required it. Inside, each opening was finished with new jambs, jamb extensions, and Pella Craftsman 2 casing in 3½”.
Once the windows were in, the crew installed James Hardie 7” ColorPlus Cedarmill lap siding in Iron Gray over a breathable weather barrier with taped seams, and added PVC trim coil flashing at the windows and masonry. They framed the windows, doors, and outside corners in 3½” Cedarmill trim (sold by Hardie as Rustic Grain) in Arctic White. The soffits, fascia and frieze boards were all installed in Iron Gray to match the siding and set off the home's rich brown tile roof. We also sized the fascia up to 9¼” to match the depth of the existing roof edge, and this detail was painted on site. Siding replacement on a tile roof is one of the elements that made this project unique and working around it added a few steps that a typical siding replacement doesn't require. One of these was that we needed to remove and reset those tiles in every location where the new siding material interfaced with the existing roof. This added a level of complexity, required careful and skilled labor to avoid breaking any of the tiles, but resulted in a beautiful finished look. The final phase of the renovations was the installation of all new white 6” seamless aluminum gutters and 3” by 4” downspouts.
Before calling the job done, Luke walked the finished exterior with the couple and built a punch list, our final round of quality checks, to ensure every finishing detail was addressed. The result is one complete exterior: new sheathing, siding, and roofline, windows flashed in the right way, and gutters sized for the home. Planning it all together is what made that possible.
Project Details
This multi-level home on Princeton Drive in Longmont was built in 1979 and has a footprint of about 1,975 sq ft. The siding project covered 1,992 sq ft of siding facade, along with about 492 sq ft of soffit, 17 outside corners, and new fascia and frieze board around the home, plus about 121 linear feet of 6 inch gutters and 123 linear feet of 3 inch by 4 inch downspouts. The window project covered 21 Pella units: 17 Impervia windows, an Impervia sidelight at the front door, one Encompass by Pella basement window, and two Pella 250 Series sliding patio doors. The project was completed in early 2026.
Materials Used
James Hardie ColorPlus Cedarmill Hardie Lap Siding in Iron Gray
Pella Impervia fiberglass windows in White with Advanced Low-E insulating glass
6 inch seamless aluminum gutters and 3 inch by 4 inch downspouts in White
The Result
The finished house looks nothing like the one Diego first visited in April. They started the project with four windows in mind and ended with a full exterior: new siding, soffit, fascia, gutters, and every window and patio door in the house. Clearly, they felt this was the right choice for them and left this review when all was said and done:
"My experience with Westpro was fantastic! I used them to replace all my windows, as well as install new siding and gutters on my home, and am very pleased with the work! Everyone I worked with at Westpro has been terrific but I spent the most time with my project manager Luke Cross. He was personable, knowledgeable and reliable and consistently followed through to make sure all the work was done correctly and that I was satisfied. I would definitely use and recommend Westpro again!" - Sandy
Thinking about a similar project for your home? Schedule a free inspection with WestPro to get started.
Siding Cost
This project was completed at approximately $32 per sq ft installed, which is above a typical Hardie install. Homeowners considering a similar James Hardie Cedarmill lap siding project in a ColorPlus factory finish like Iron Gray should generally expect pricing between $20.00-$22.50 per sq ft installed for the core siding product, including tear-off, house wrap, and standard trim. Broken down, the cost of the siding itself on this project actually landed right in line with that cost. The difference came from everything else the job included such as added labor for the roofline, all new soffit and fascia as well as a substantial amount of new OSB.
In fact, the core siding work comes out to about $19.70 per sq ft, which is right below what we'd expect. That figure covers the tear-off and disposal of the old wood siding, ColorPlus lap siding, standard trim and trim coil flashing as well as mounting blocks for lights, spigots, and outlets, decorative trim, fasteners and sealants, and ColorPlus caulk and touch-up kits.
The roofline work alone added about $8.80 per sq ft. Not only that but the home has about 500 sq ft of soffit which was replaced along with the fascia, which isn't typically part of a basic siding replacement. Finally, the whole house was re-sheathed in new OSB to give the new siding a solid surface to fasten to. This added about $3.80 per sq ft to the project total. Because not every home needs new OSB, we don't build it into our baseline price for siding.
This home is a great example of why no two siding projects price out the same. The biggest swing usually comes from what's behind the old siding: if the sheathing needs replacing, that cost isn't visible until the walls are open. Scope matters too. A job that includes soffit, fascia, and gutters will cost more per square foot than siding alone. Taller homes, multi-story homes, and homes with lots of corners and rooflines take more labor and more trim. Site access and current material and labor costs round out the picture. Our siding cost guide breaks down each of these in more detais and reflects WestPro project data and current Colorado Front Range supplier costs.
Window and Door Cost
The cost of the windows tells a similarly nuanced story. According to a breakdown of the total cost divided by the number of windows, the total cost per unit was approximately $3,750 per opening, which is above the typical per-window range for Pella Impervia. But, the reason for this gap is quite simple. It all comes down to what's being counted as a "unit."
Of the total number of “windows” on this project, two are actually sliding patio doors, which both cost more to buy and to install. Many of the windows are also large, multi-panel units. All in we installed three-wide casements, two-wide casements, three triple sliders, and two pairs of windows combined into single larger units. Even though each of those windows counts as only one window, in fact, they cover the wall area of two or three standard windows.
The price also included interior trim on every opening, with new jambs, jamb extensions, and a specialty Craftsman casing. Finally, code required that some windows be upgraded to tempered glass, which also drives up costs.
Homeowners considering a similar Pella Impervia fiberglass window project today should generally expect pricing between $2,250-$2,600 per average window installed, plus about $600-$950 per window for interior jamb and casing.
Factors that impact window pricing include the total number of windows, their size and configuration, the product line that's selected, the glass package, local energy code requirements, whether interior trim is included, permits, and how difficult the openings are to access. Full-frame replacement, which is our standard, costs more than an insert but lets us inspect and flash every opening properly. Our window replacement cost guide covers these factors in more detail and reflects WestPro project data and current Colorado Front Range supplier costs.
An accurate price requires a site inspection and project-specific estimate. The best next step is a free, no-obligation inspection.
Gutter Cost
This project was completed at approximately $13.90 per linear foot installed for the gutters. That's right at the starting point of the typical range for 6” seamless gutters.
That rate covers about 121 linear feet of new 6 inch seamless aluminum gutters in white, installed after the old gutters and downspouts were removed as a part of the siding replacement.
This home required almost the same linear footage of downspouts as the gutters themselves, also at about $13.90 per linear foot. The downspout footage is the detail worth noticing. On a multi-level house, downspouts have to run from upper rooflines all the way to the ground, and this home needed six of them to drain its separate roof sections. Counting gutters and downspouts together, the full system came to about $28 per linear foot of gutter.
Homeowners considering a similar 6 inch seamless aluminum gutter project should generally expect pricing starting around $13.90 per linear foot installed, with oversized 3” by 4” downspouts priced separately.
Gutter pricing depends on gutter size, downspout size, count, and length, the number of stories, the condition of the fascia the gutters mount to, whether the job is bundled with siding or roofing, as well as current material and labor costs. Our gutter cost guide breaks this down further.
free, no-obligation inspection.An accurate price requires a site inspection and project-specific estimate. The best next step is a
1979 Exterior Update
The home itself is a multi-level house with a lot going on at the roofline. Gables step up and down across the front, a smaller gable shelters the entry and deck, and brick wraps the base near the garage and front door. On top of all that, is the home's brown tile roof. Before this project, the walls were a vertical-groove wood siding in an aged teal green, with light trim around the windows. The vertical grooves ran the same direction as the tall gable walls, and the green competed with the warm brick and brown tile instead of setting them off.
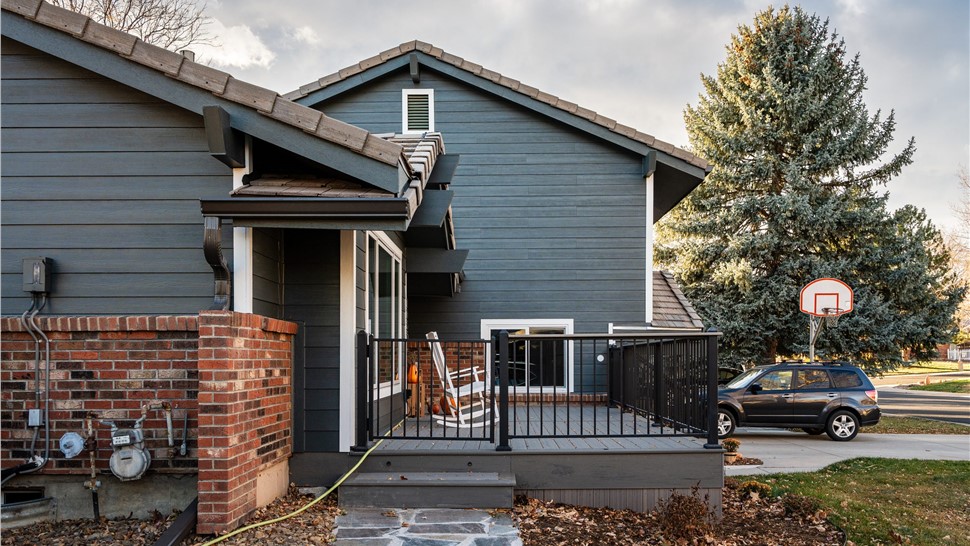
Cut to today: the exterior has been simplified modern exterior color scheme. This gray and white exterior features James Hardie 7” ColorPlus Cedarmill lap siding in Iron Gray, with 3½” Arctic White Cedarmill trim around every window, door and outside corner. This contrasting trim draws the eye to the beautiful new windows and highlights the shape of the home around the outside corners. By contrast, Sandy and Katie chose to keep the same Iron Gray as the siding which continues up through the soffit, fascia, and frieze board. This keeps the palette clean and simple which in turn serves to feature the home's elegant brown tile roof.
The biggest change from the street is the shift from vertical to horizontal. Because the lap siding runs across each wall plane horizontally, it ties the stepped sections of the house together instead of making each one read as a separate tall panel. The Iron Gray body gives the house a deep, quiet base color, and the Arctic White corners outline each section of the house, so its stepped shape now reads clearly from the street. With the cooler gray around them, the brick and the brown tile roof finally read as warm accents rather than fighting the siding.
The result is a 1979 house where the details finally line up: a gray body, crisp white outlines, white windows, and a tile roof and brick base that now look like they were chosen to go with the rest.
About the Author: Lily Coleman helps homeowners imagine, visualize, and translate their vision into a finished exterior, one that reflects their budget and values, as a Design Consultant at WestPro Home Exteriors in Longmont, CO. She works to help homeowners make informed decisions for a finished project that feels like home.
About WestPro Home Exteriors: Licensed and insured roofing, siding, gutter, and window replacement contractor in Longmont, CO. GAF Master Elite Roofing Contractor. James Hardie Elite Preferred Contractor. Pella Windows Platinum Certified Contractor. Serving Longmont, Boulder, Denver, Fort Collins, Loveland, Estes Park, and the surrounding Colorado Front Range.
Read More